Cat Defense: Real-time edge object detection system
Intro
I have a cat. The cat believes that every surface in the kitchen is its territory (especially the kitchen table and the sink). That alone wouldn't be a problem. However, it sheds everywhere. And after using the litter box, its paws leave little reminders on the counters of exactly what it’s been up to.
I tried all sorts of approaches, from treat-based training to an automatic feeder. But nothing really worked. I have to stay constantly on guard every day. Dishes get washed promptly. Food gets put away immediately. Surfaces get wiped down before every single meal... Maybe that's normal for some people, but honestly, I was burned out.
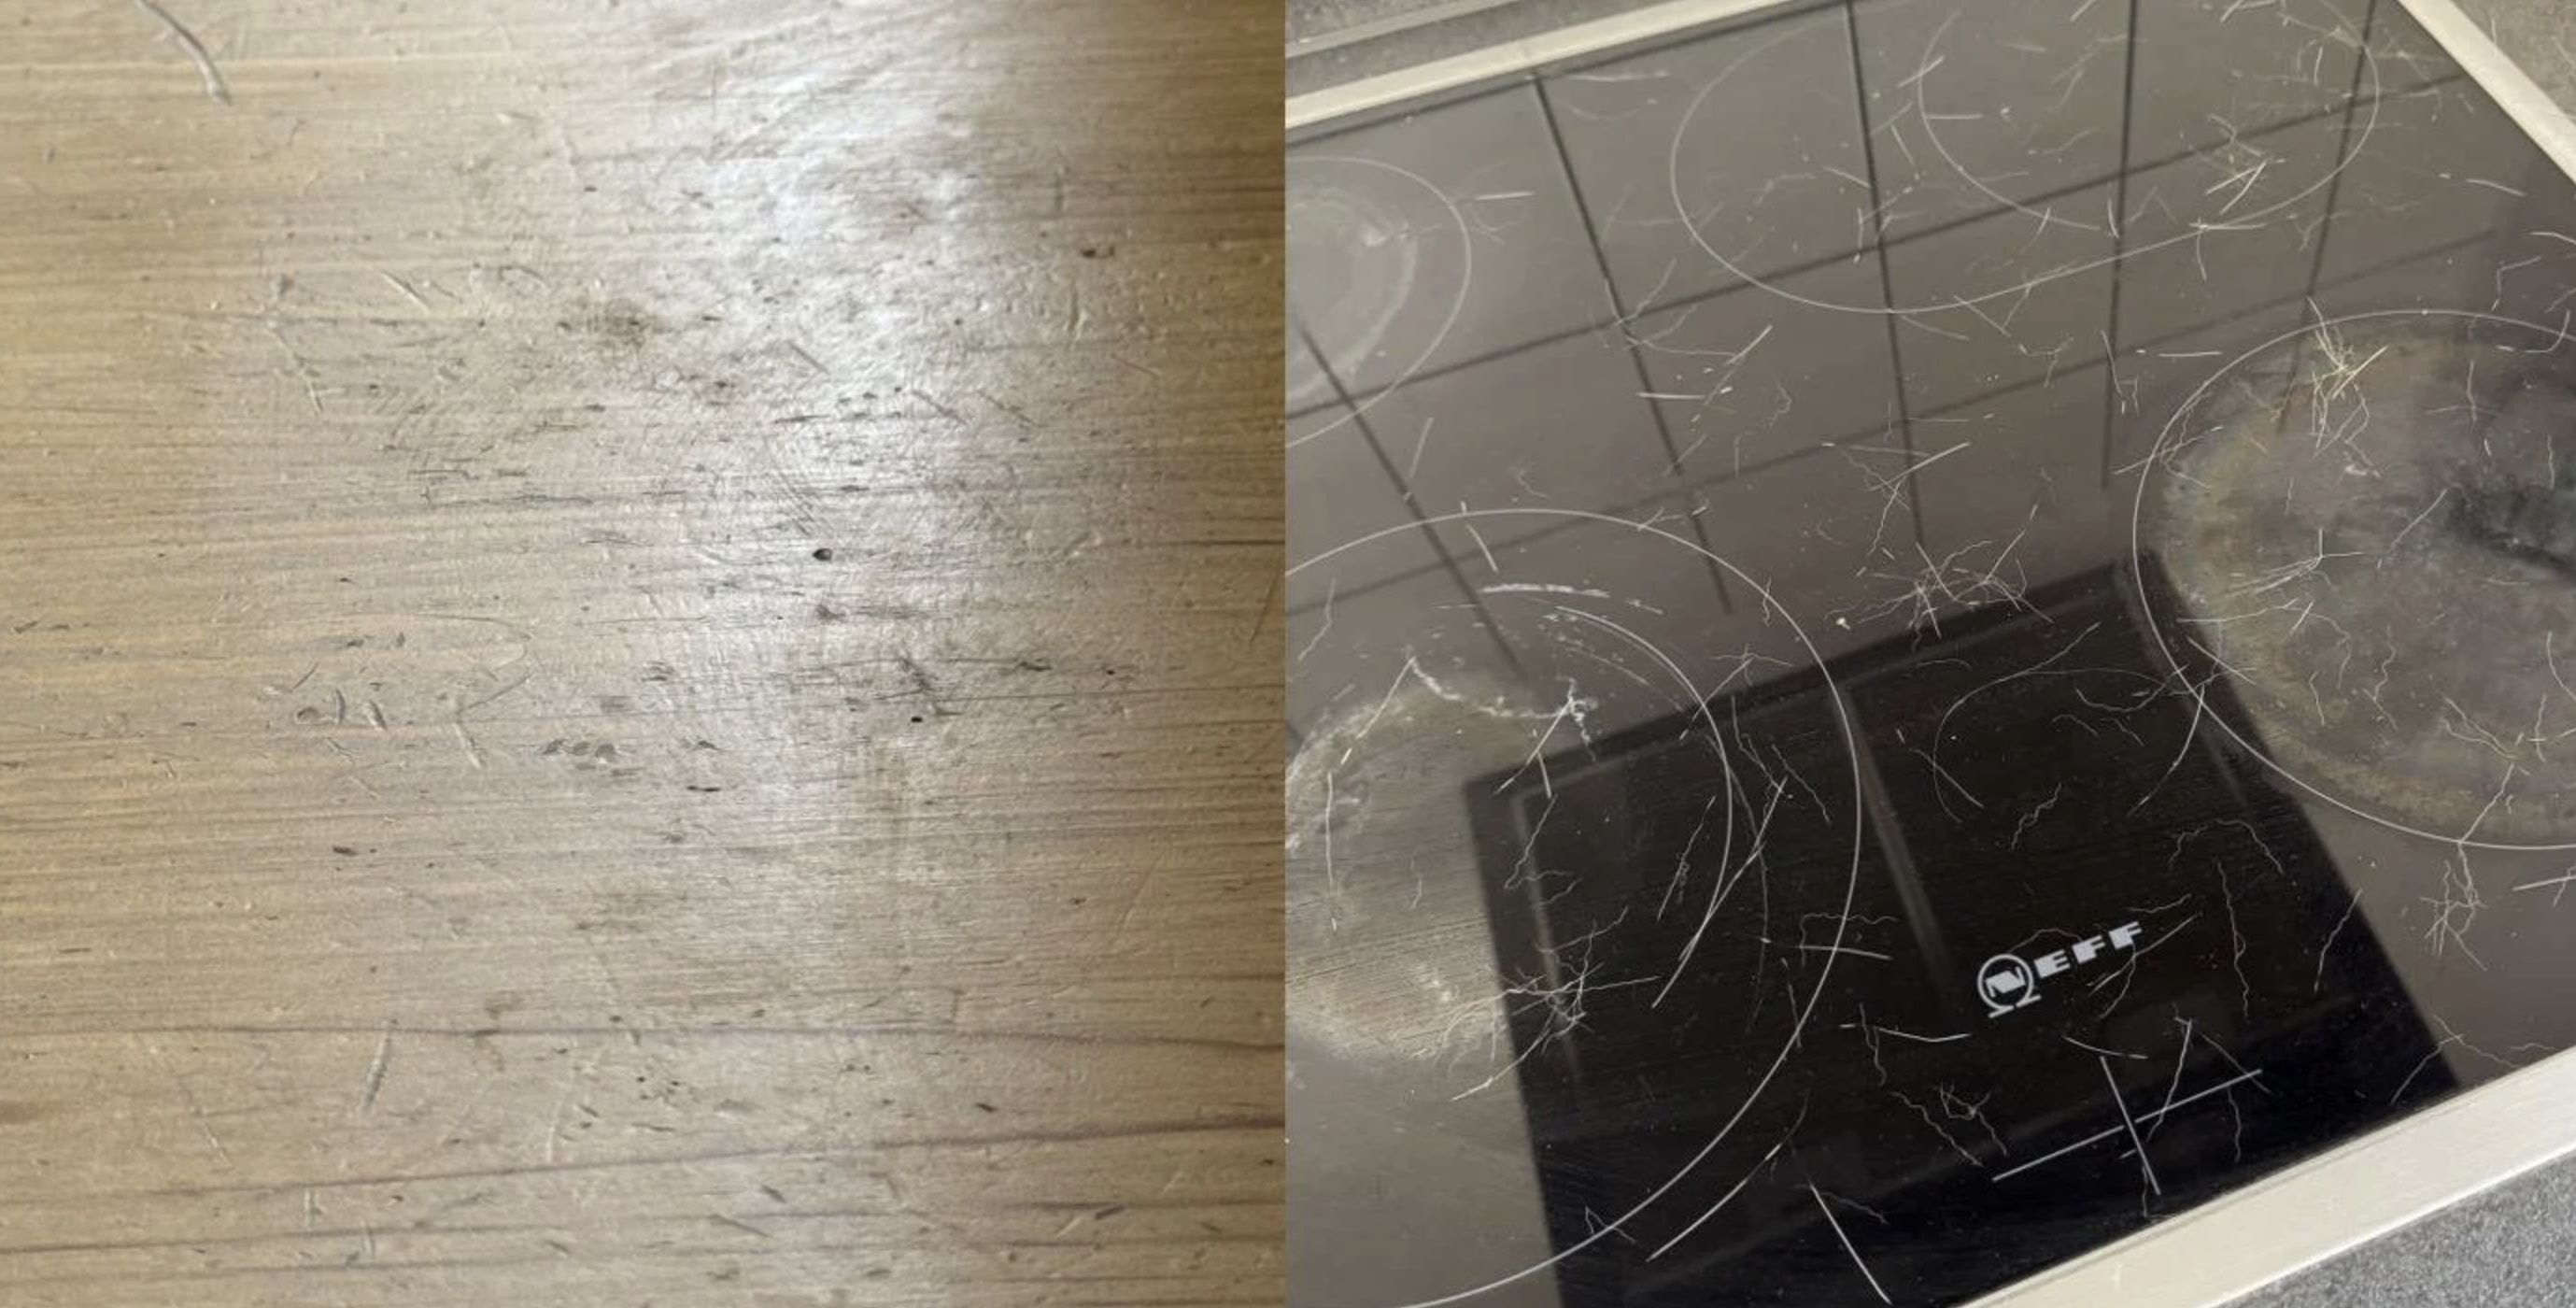
At some point, it hit me: It would be great to have some harmless way to chase the cat off the table. Something like a little water sprayer – effective, but completely safe for the animal.
Ideally, it should be automated, too. It should work even when no one is in the kitchen. It shouldn't spray people in the process. It should pinpoint the cat's exact coordinates so it doesn't miss. And it should have a built-in camera. And...
So I decided to take this seriously and started building a system to defend our home territory from a dangerous predator – a cat misbehavior preventer.
The “cat defense” system has two parts. The first part is a vision system (camera + CV) for object classification. The second part is a deterrent water turret that receives the target's coordinates. This article covers only the first part. But I promise, the part with the water turret will be published soon :)
What the vision system currently consists of:
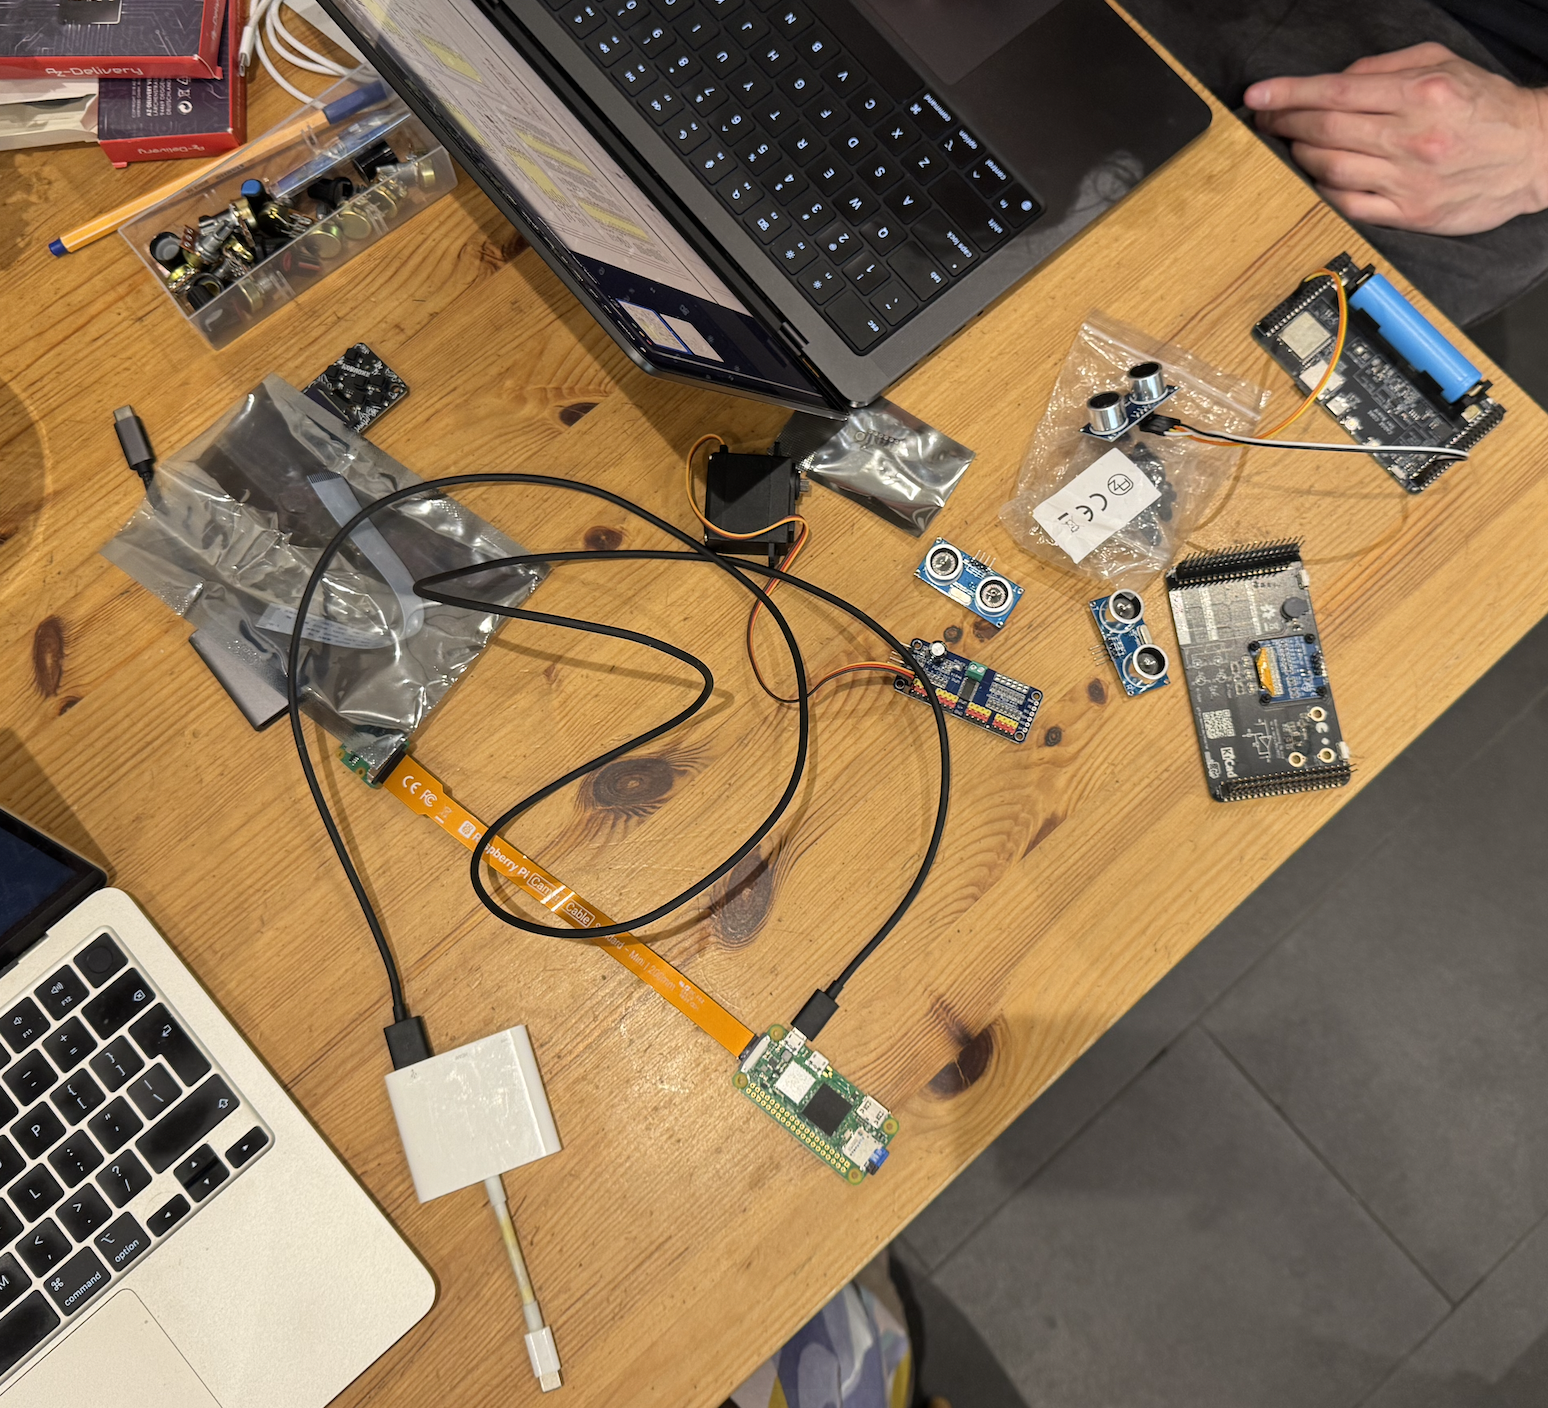
- A Raspberry Pi camera filming the kitchen from an optimal angle (libcamera);
- A Raspberry Pi Zero 2 W handling the stream (MediaMTX, RTSP);
- A Raspberry Pi 5 receiving the stream (ffplay) and running the main program (Python);
- The main program for reading frames (cv2) and running YOLOv8n (Ultralytics) for motion detection and object classification using a Region of Interest (ROI);
- A fine-tuned version of the model trained on custom data (manually labeled in Label Studio) to better distinguish the cat from human hair (training code in Google Colab to use GPU). This process deserves its own write-up, so I'll save the details for a separate post;
- A buzzer that triggers when the cat enters the zone of interest + an HTTP server (Flask) for remotely triggering the alarm code on the Raspberry Pi Zero 2 W;
- Ansible for task automation + systemd for running everything in the background.
The bulk of this article walks through the challenges and problems I ran into while building this out. Hopefully, it's useful to anyone with similar interests or similar problems.
First YOLO test run on the Mac
The most logical place to start is testing the model's potential on whatever hardware is already on hand. Let’s grab a laptop and use its built-in camera.
We want to install ultralytics and import YOLO. I recommend going with YOLOv8n since it's lightweight and fast. Exactly what we want for our humble little home operation :D
YOLO (You Only Look Once) is a family of computer vision models for real-time object detection in video. Every object in a training image gets annotated in two main ways:
- Label – the object's class (e.g., "cat," "person," "cap"). This is what the object actually is;
- Bounding box – a rectangle drawn as tightly as possible around the object, defined by coordinates (x_center, y_center, width, height). This is where the object is located.
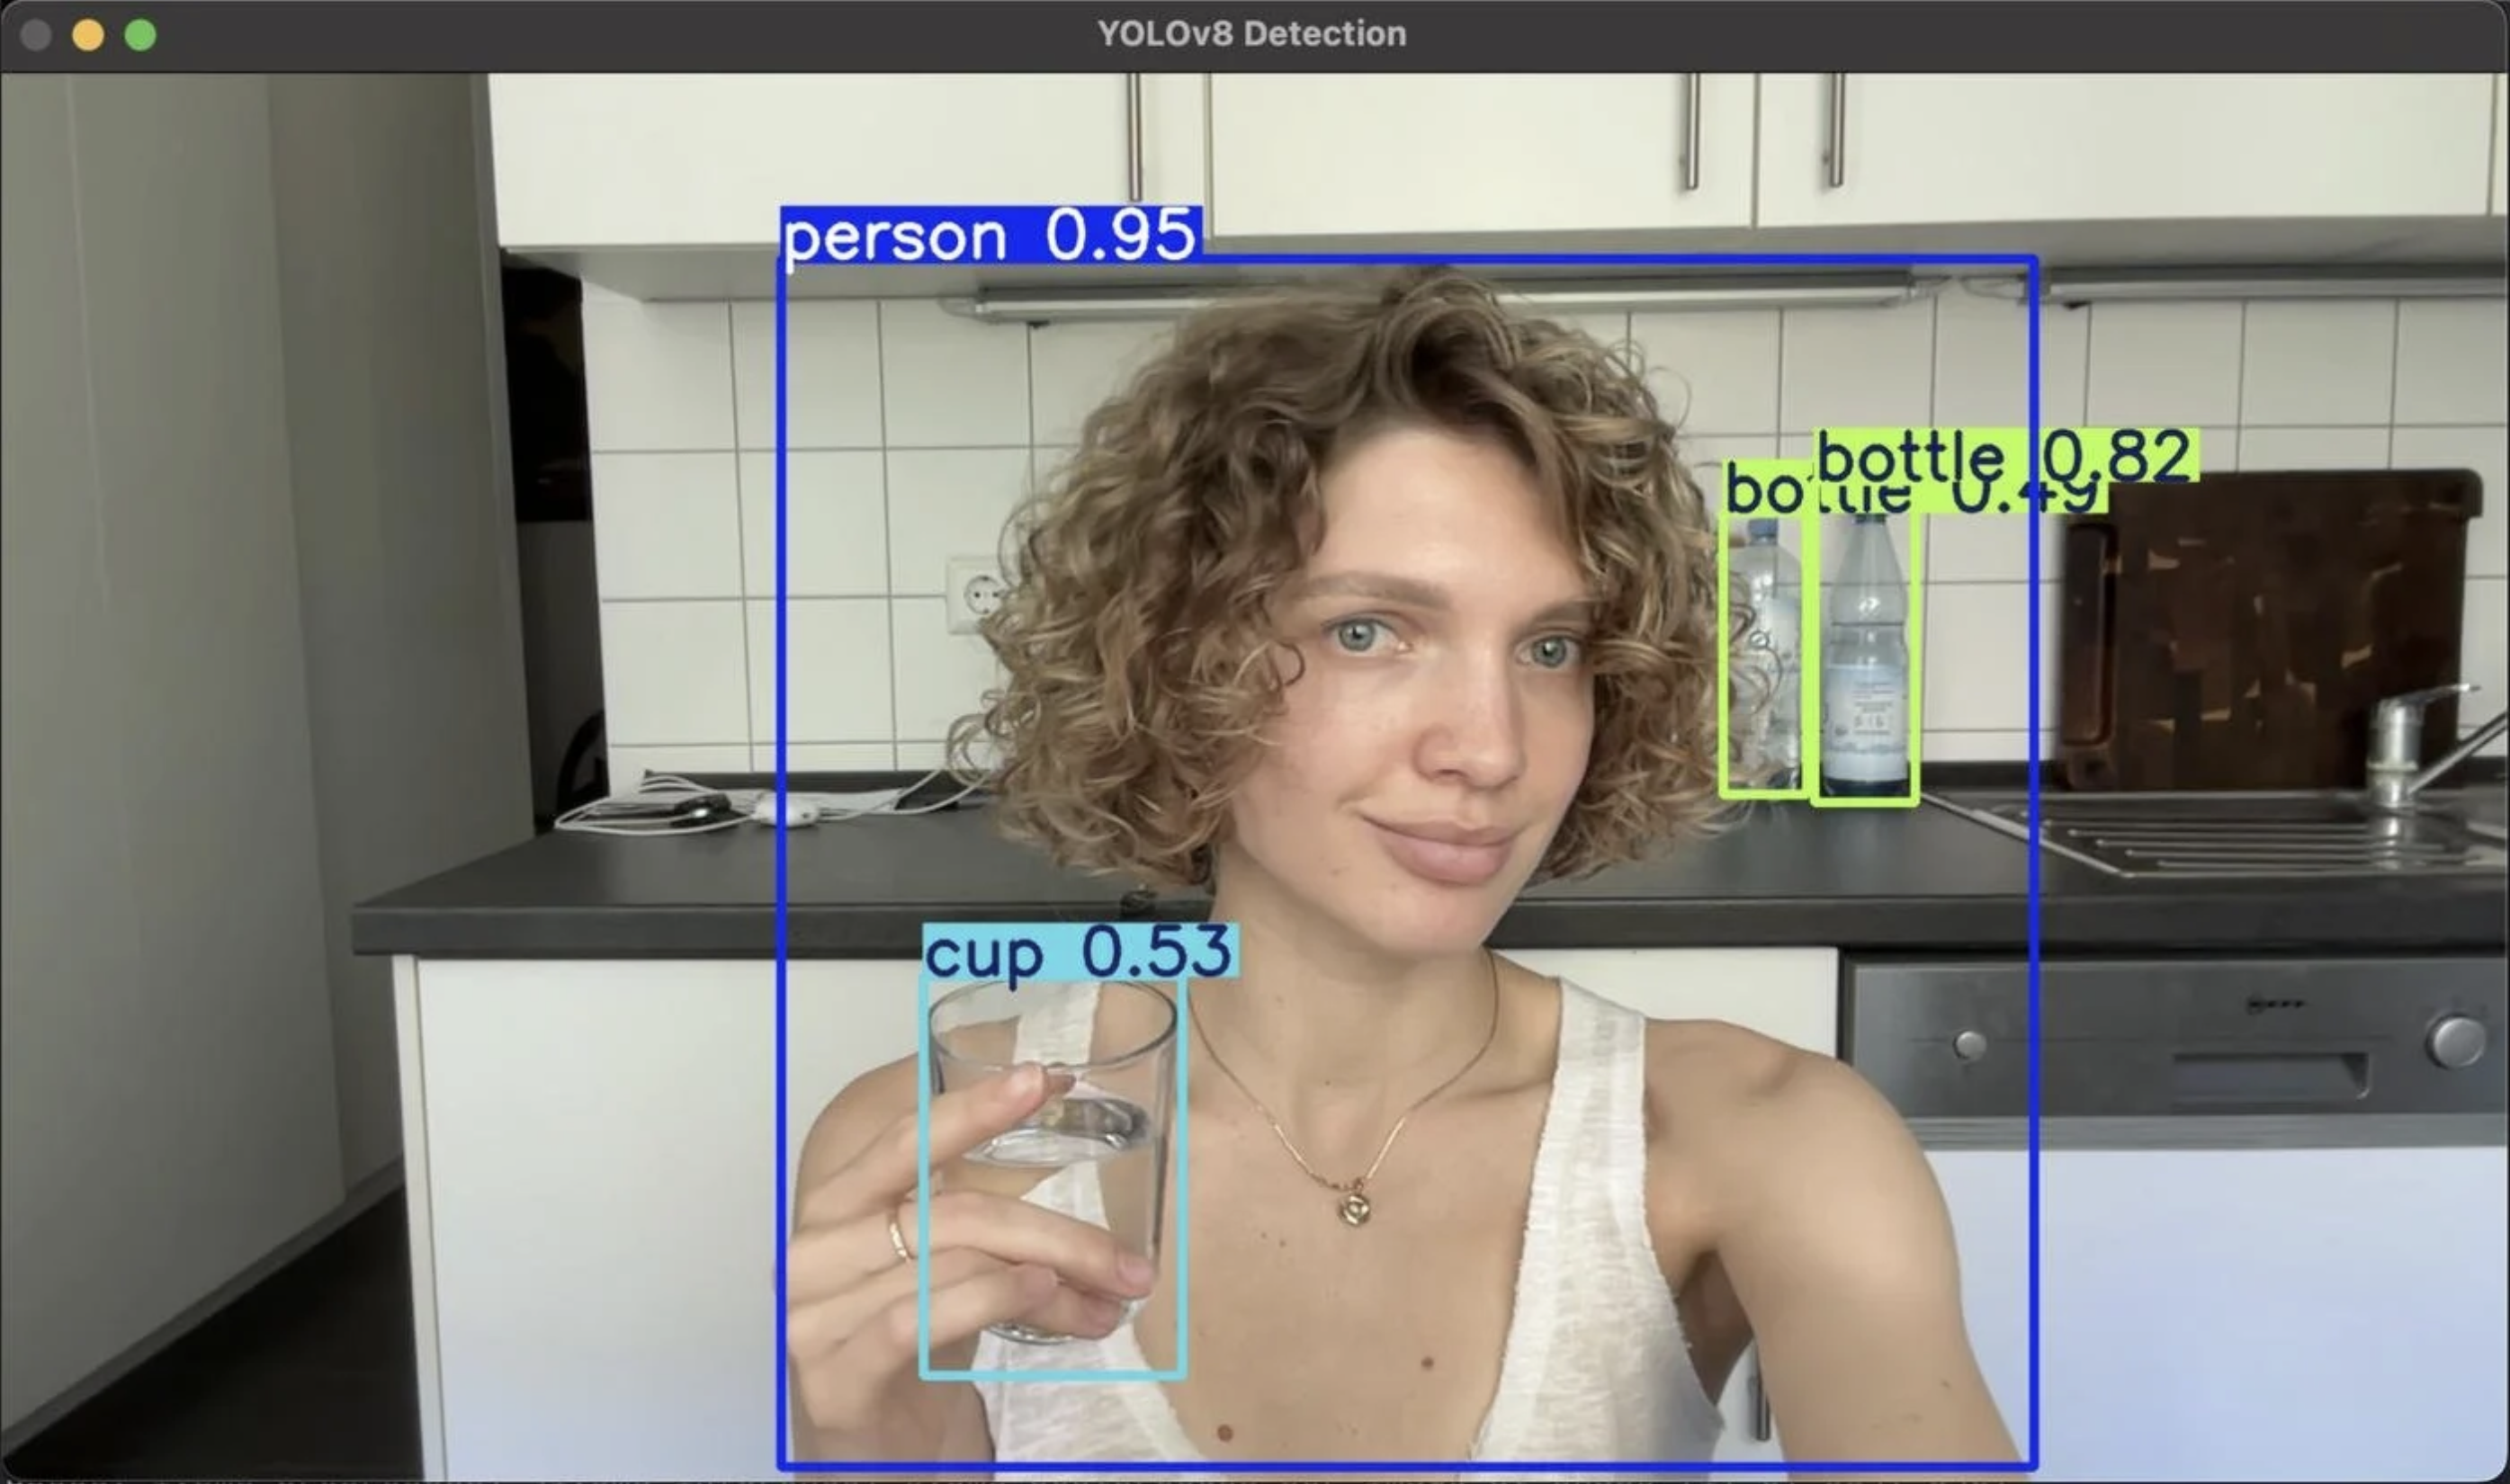
Let’s capture video with cv2, loop through reading frames from the stream, and run the model on each one. For every frame, the model outputs labels and bounding boxes. We draw them on a copy of the frame, and that's the final frame shown to the user. The result is a continuous video with real-time model output.
Everything works! Meaning, the idea is feasible in principle. And right away, we can run into a problem which can be actually solved here and now...
Adding a Region of Interest (ROI)
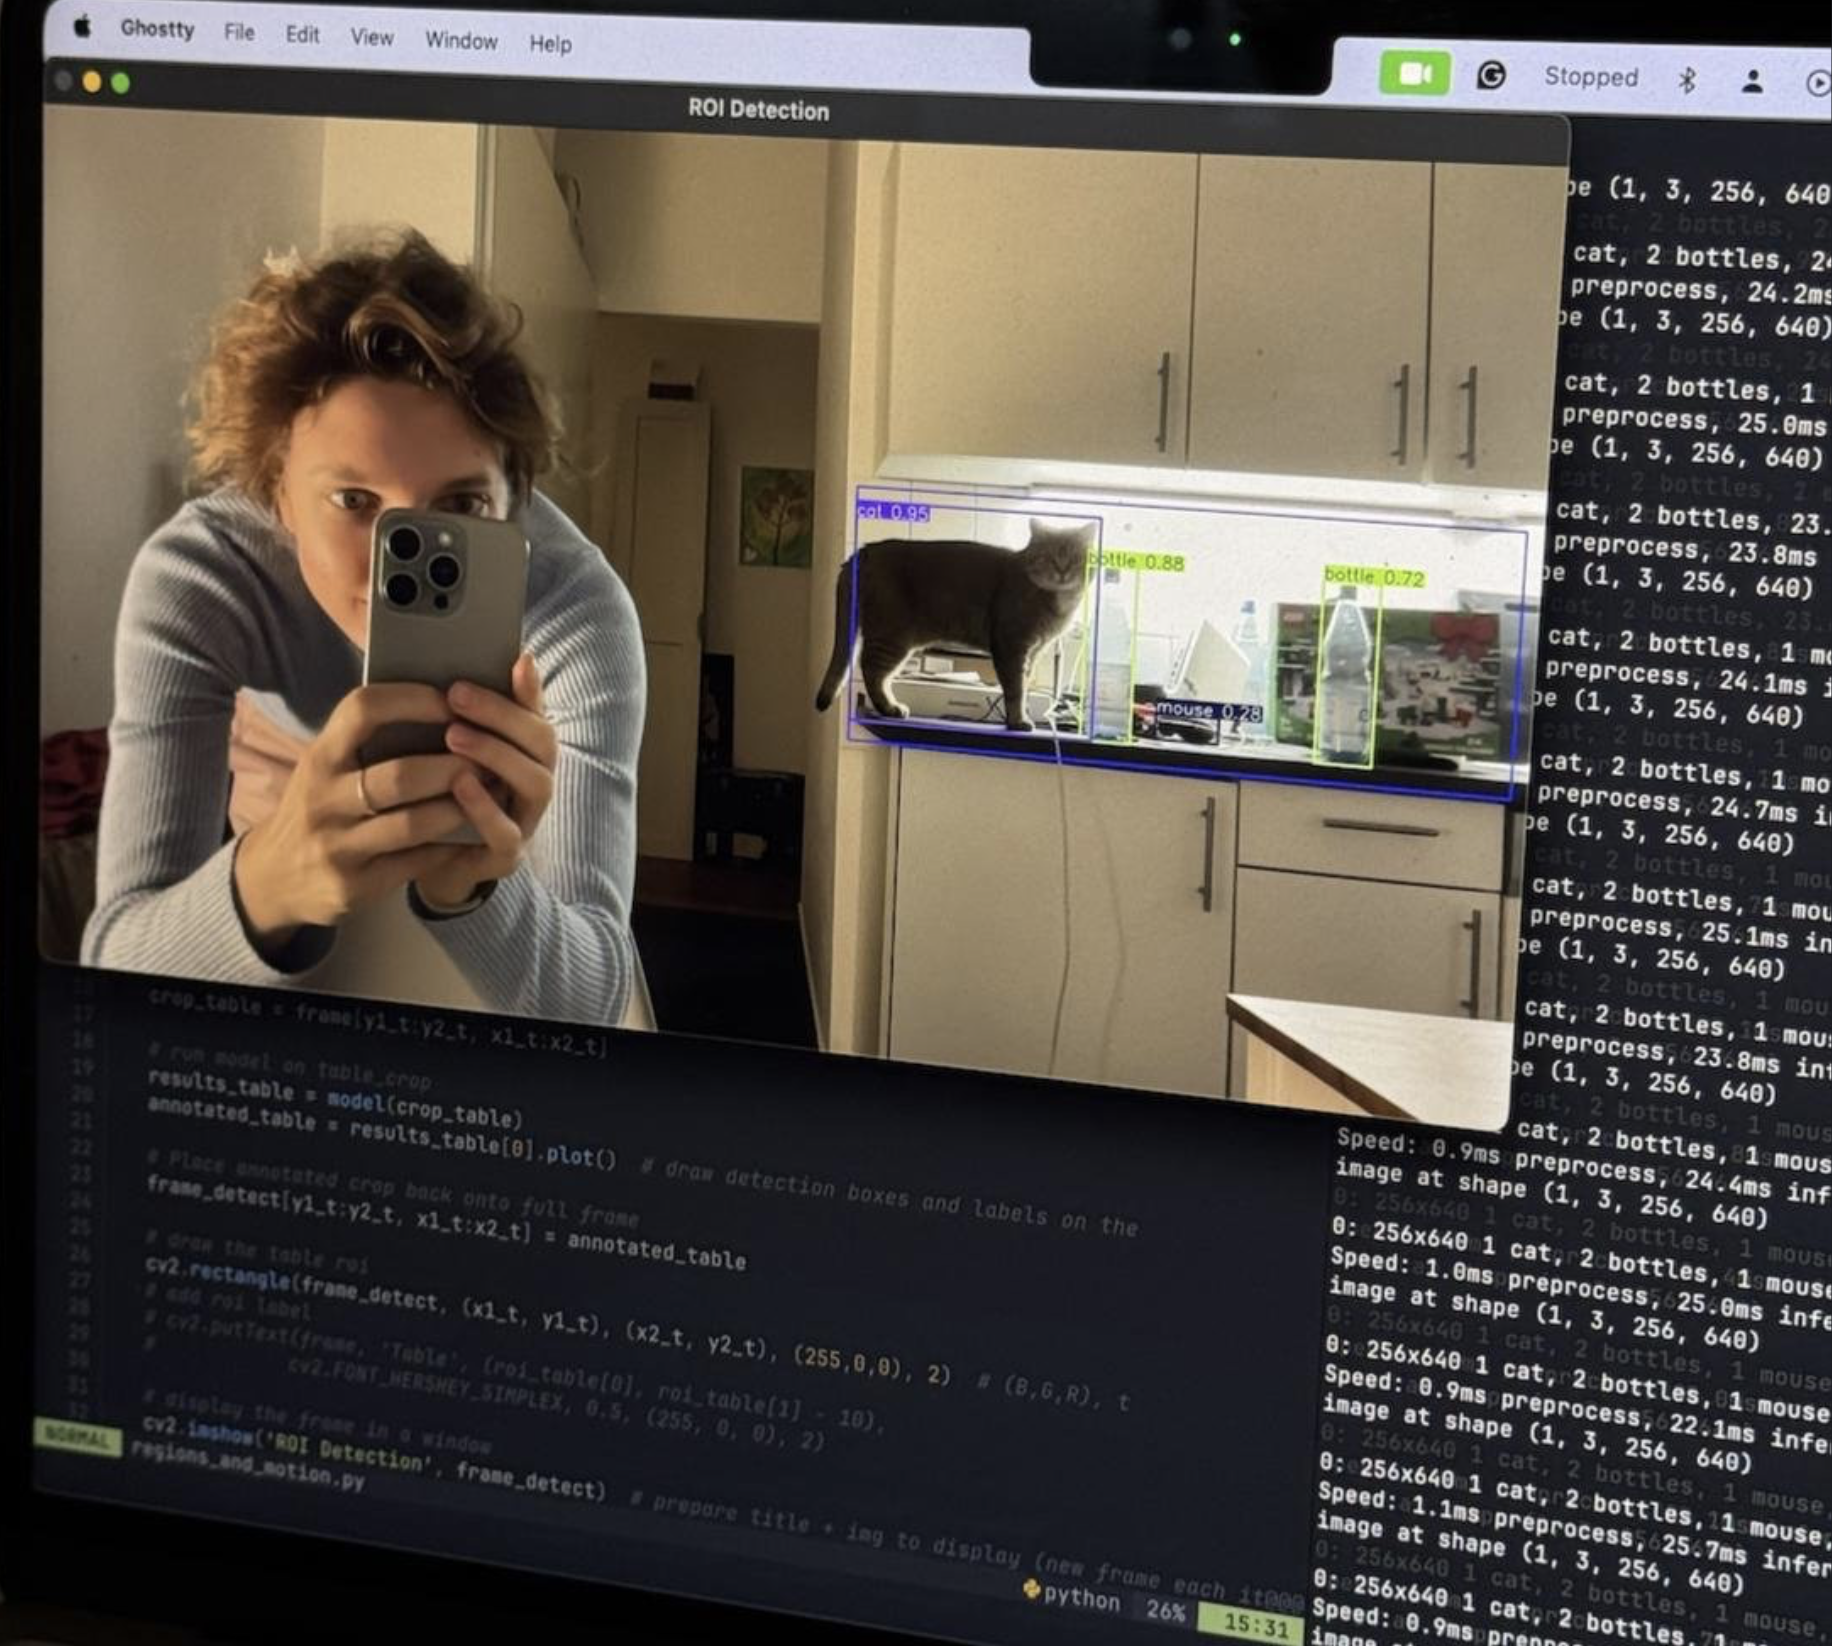
The camera picks up every part of the kitchen at once (including the floor, the couch, and the windowsill). YOLO runs on everything the camera sees with no exceptions.
However, you probably don't want to turn the entire kitchen into a "red zone" for the cat. It's fine if it walks across the floor, lounges on the couch, or even hops up on the windowsill. Our target zones are only the kitchen table and the sink. It means the detection system should only be active in those areas.
But how do you tell the model to ignore one thing and focus on another one?
The solution is to add a Region of Interest (ROI) – defining the one zone in the frame that the model is actually "allowed" to process, while everything else gets ignored.
My implementation is quick and dirty, nothing fancy: Set ROI coordinates by drawing a rectangle on the frame (four corner values: top-left, top-right, bottom-left, bottom-right).
The downside of this approach is that the values are fixed and not adaptive: You have to tune them by hand to isolate the area you care about. Moreover, you can not move the camera after drawing a rectangle. The reason is that the rectangle is just overlaid directly on the image, and the region can end up "drifting" relative to what's actually in frame.
That said, the “rectangle” approach works fine for my purposes, since the camera stays in a fixed position and the boundaries of the target area never change.
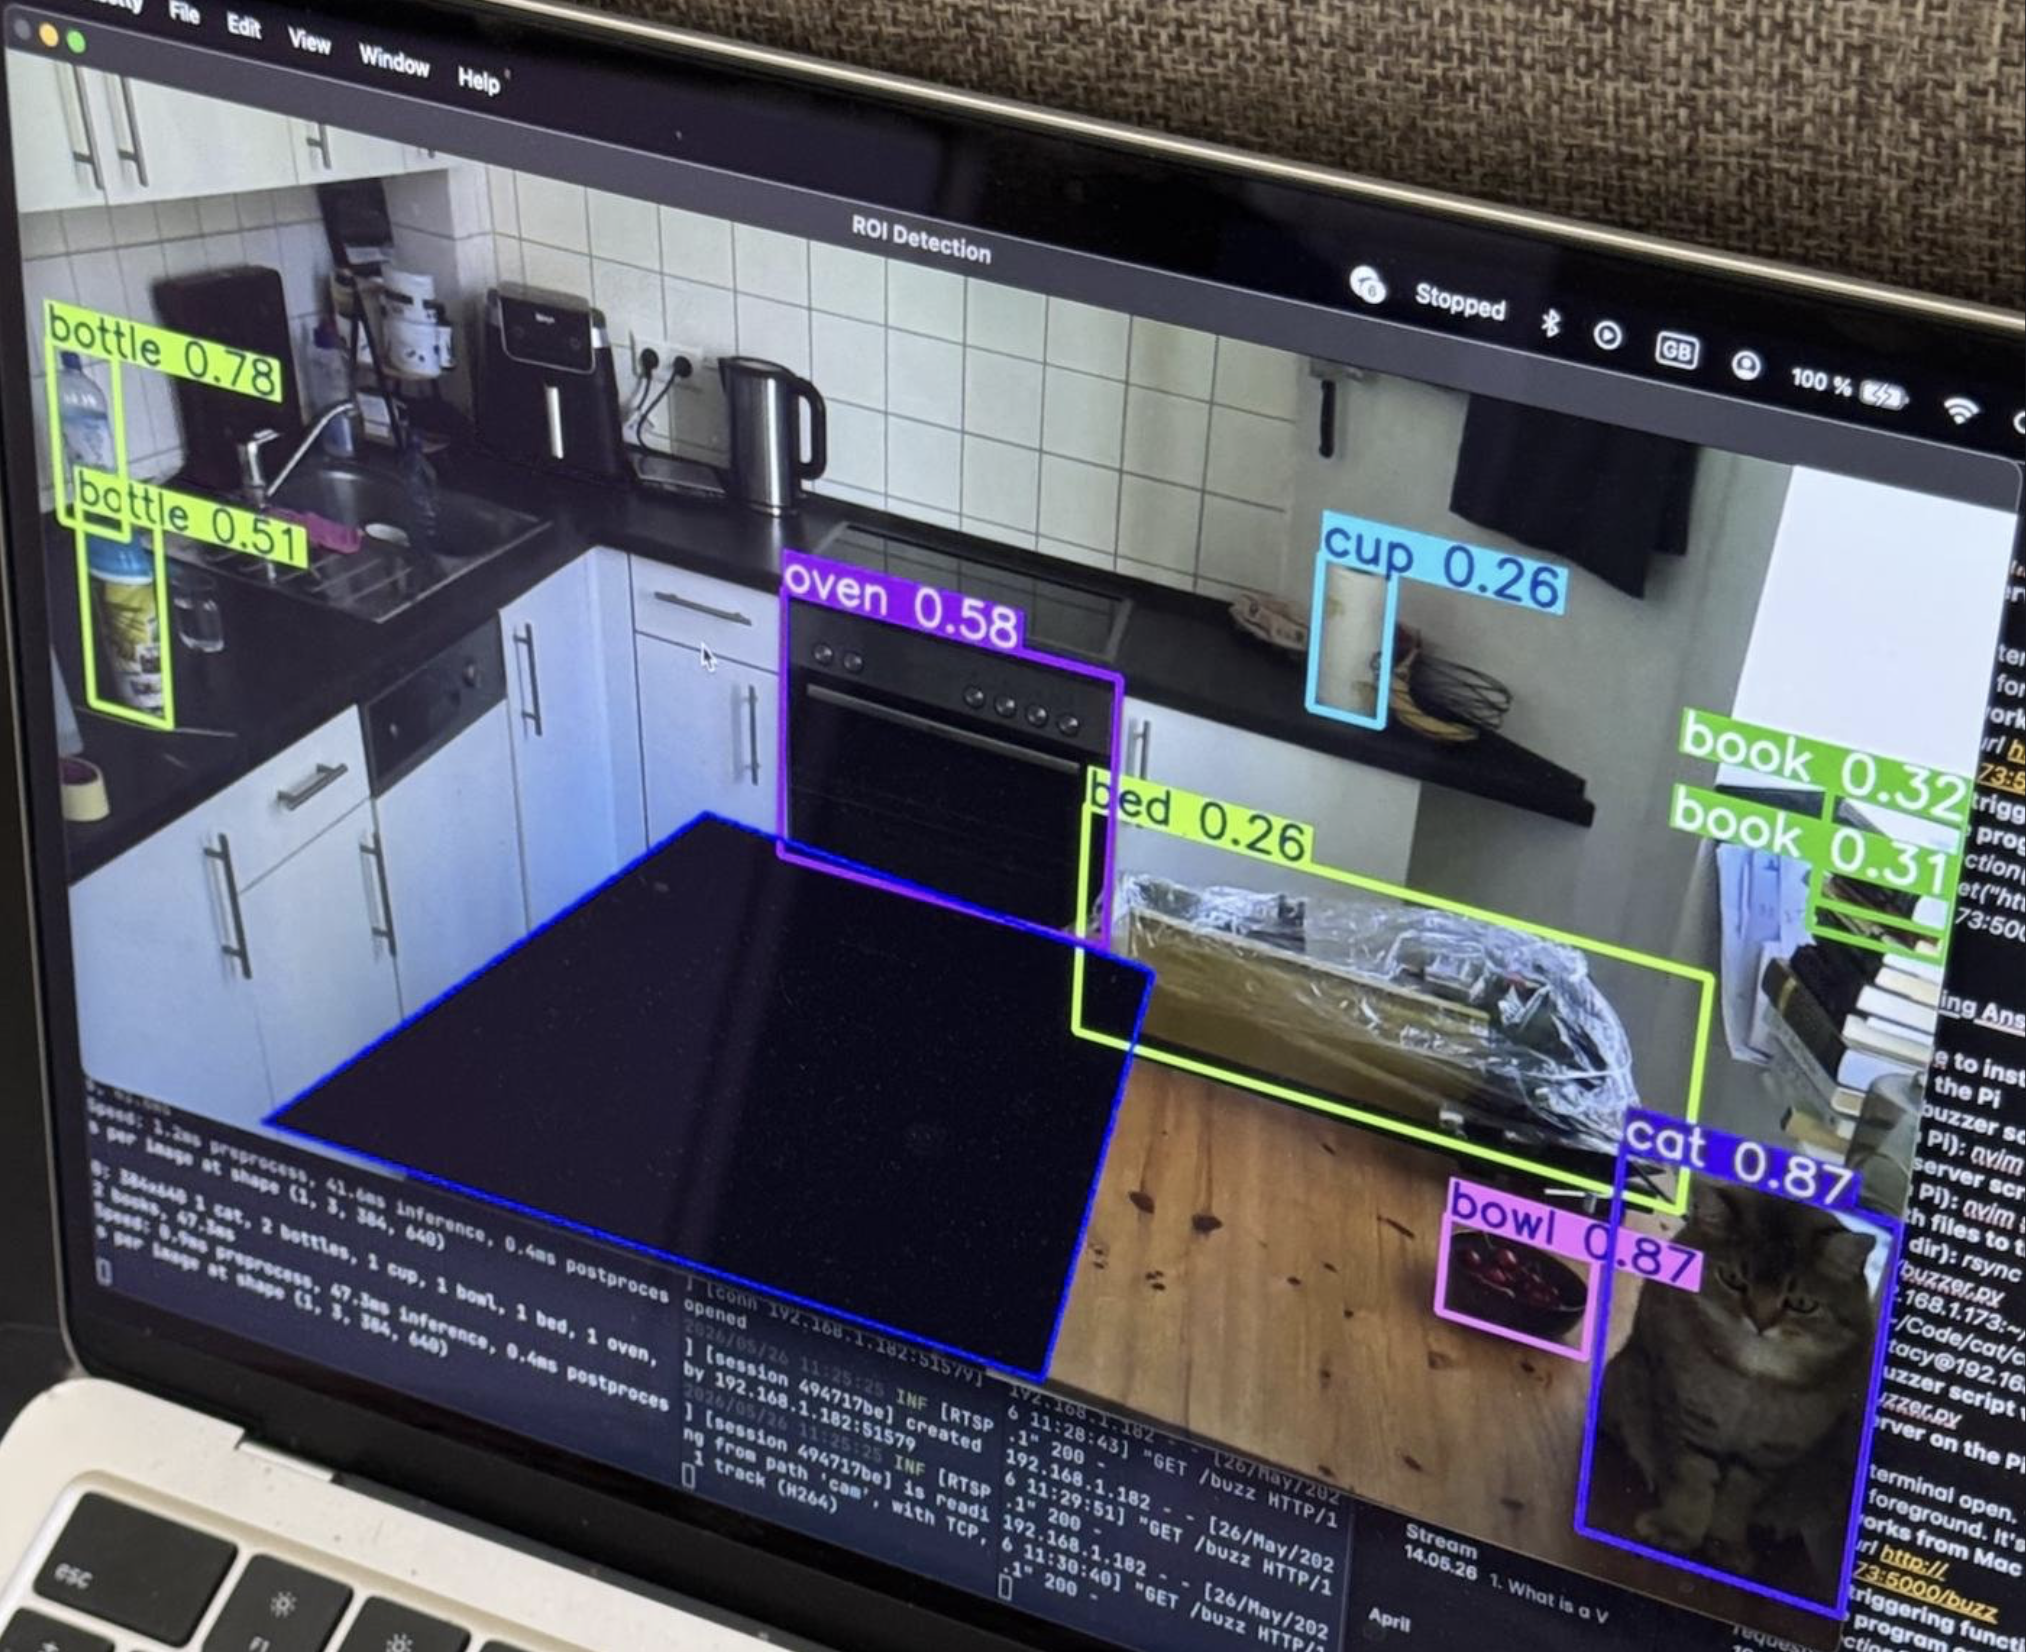
Let’s set the ROI coordinates, crop a copy of the frame to those coordinates, run the model on the cropped image, draw the model's results on that same crop, paste the image back into the full frame at the same spot, draw the ROI boundary on the full frame, and show the final full frame to the user.
Done! Now we've got a working version that only detects the cat when it's on the table.
Raspberry Pi camera: Streaming to the Mac
Running YOLO on a webcam already looks impressive. Indeed, it makes a great starting point for a lot of projects. But our goal is to film the whole kitchen, not end up filming ourselves hunched over the laptop.
What is needed is a dedicated camera and a device to transmit the signal. So let’s order a Raspberry Pi camera along with a Raspberry Pi Zero 2 W. Now we can get to work on a proper stream!
First steps
First, let’s physically connect the camera to the board. We also need to dig up an old SD card sitting in a drawer and flash it with Raspberry Pi OS 64-bit Lite. After these steps, we can SSH in from the Mac to check access to the camera. We're gonna use the default libcamera software for this.
Great, the camera works! And it's already capturing something. But there's no way to check what that "something" actually looks like, since the Pi Zero has no display.
You are probably dying to know what the quality, resolution, and color rendering look like. And honestly, whether the camera itself is even any good... But that's still one more step away.
The stream
To stream video, you need a streaming server that sends data over the network using a specific protocol. Any device on the same local network can then access that stream (as long as it has something like an ffplay client to read it).
For this, I recommend going with the MediaMTX server. It supports a bunch of protocols, but the one we care about is RTSP (Real-Time Streaming Protocol). Let’s install the server on the Pi. Inside, there's the program itself and a .yml config file. We set up the stream, choose the protocol, and specify the camera through that config file. We also want to configure image parameters, FPS (frames per second), and other transmission settings. Now we can start the server on the Pi.
When the server is started, it is time to connect to it from the laptop using ffmpeg. But do not forget to specify the protocol and other connection details.
And there it is – the first video! It feels like finally picking up a signal from the moon... Except the image looks like it's been shot through fogged-up glass: completely unreadable, with brutal lag on top. This is where we dig into the MediaMTX config again in order to tune the width and height, FPS, bitrate, and the ffplay buffer settings.
It worked! Clean image, no lag. The camera turned out to be great. The quality pleasantly surprised. The color rendering is right where it should be.
YOLO on the stream
Now for the easy part: Try the model on it! There's barely any work left here, since the model doesn't care where the frames come from. Let’s take the original code and just swap out the webcam input for the stream.
Now run it – and the model produces results straight from the camera feed. Good job! Smooth sailing from here... right?
Troubleshooting: Stream lag, but from where?
...Everything's smooth for exactly one second. Then the lag kicks in. It fluctuates – sometimes worse, sometimes better - and at one point it climbed as high as two minutes. Diagnostics showed the lag was happening even on a clean stream with no YOLO running. And the server kept throwing the warning "discarding [N] frames."
The cause here could be coming from pretty much anywhere.
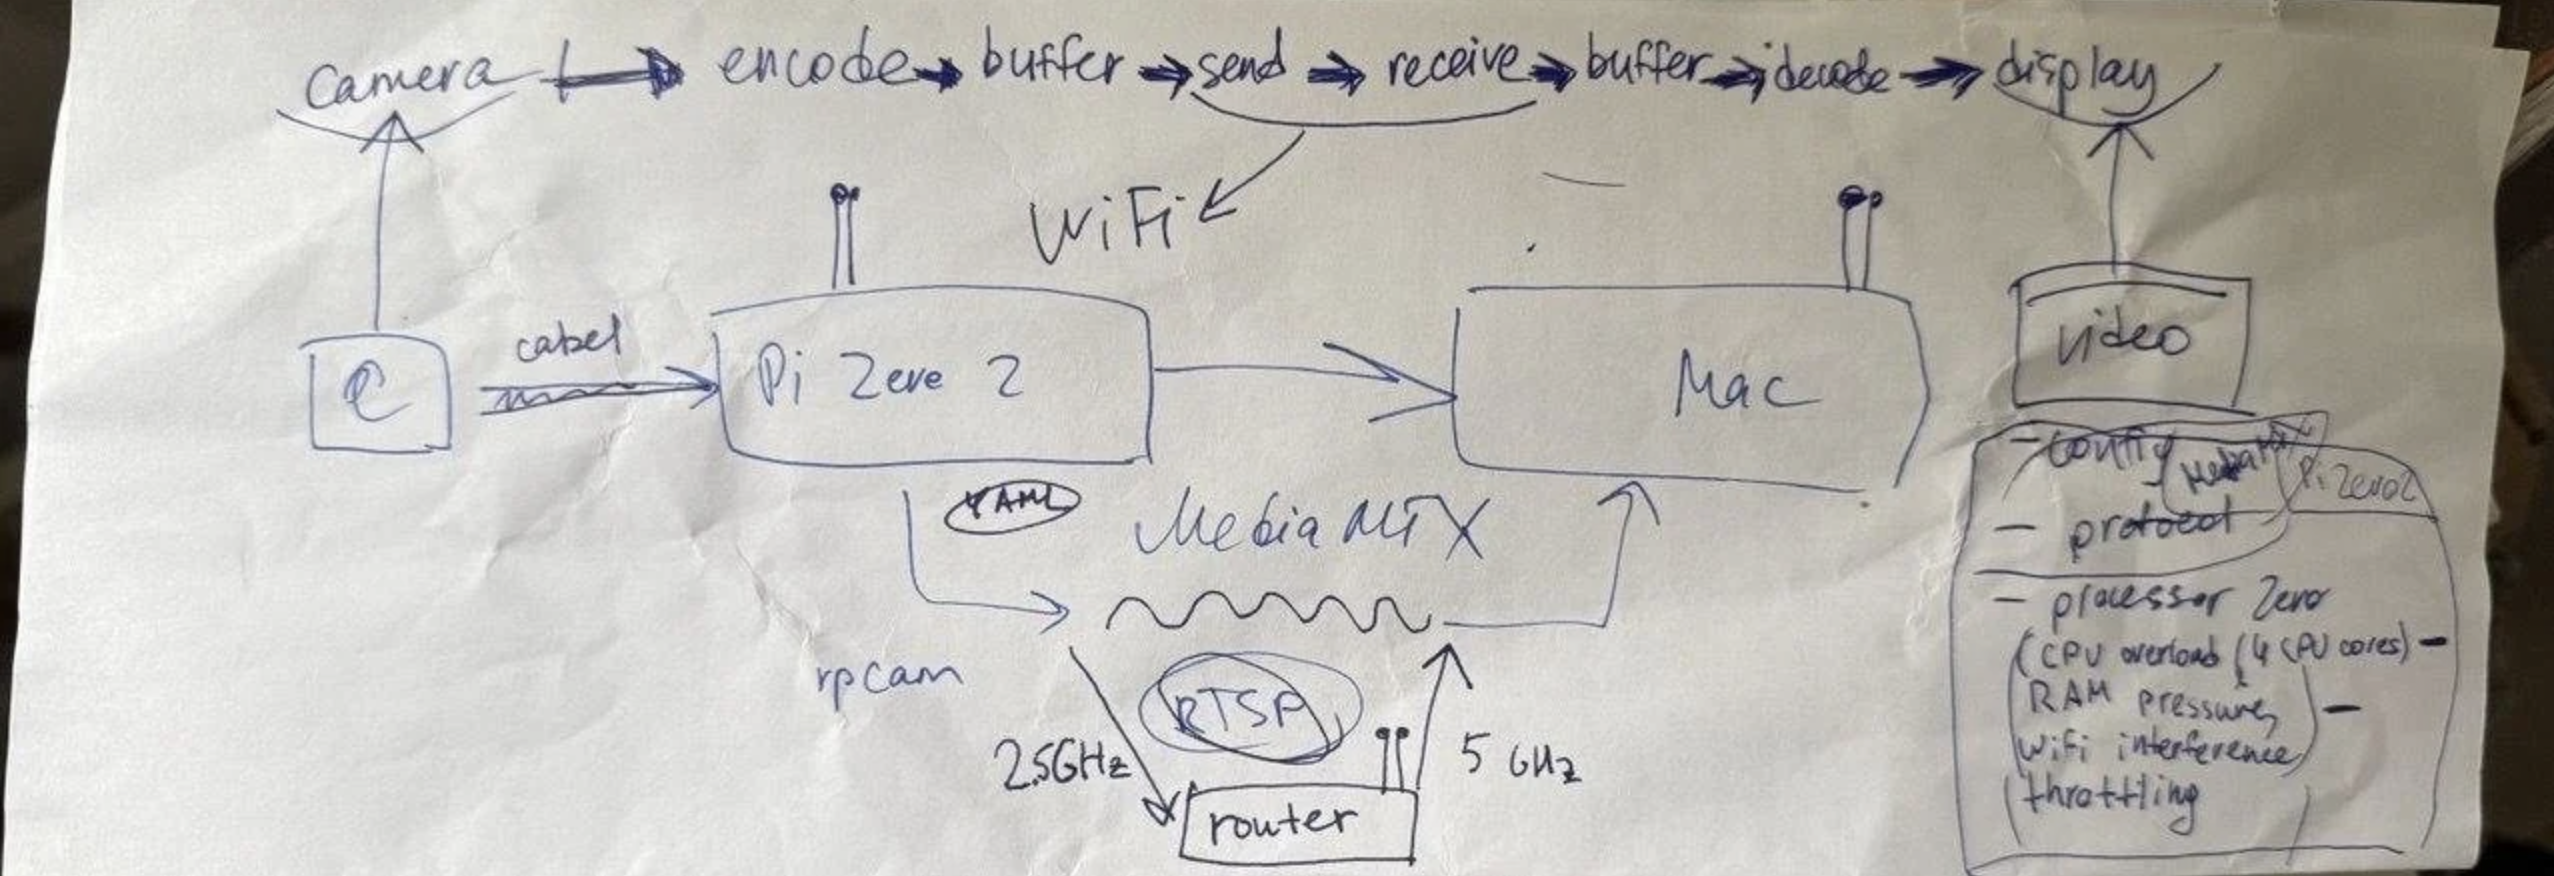
Speaking shortly, streaming means sending frames over the network: The camera fires off an endless stream of frames one after another, while the receiving program pulls them in and uses them. But in detail, the chain looks roughly like this: camera → encode → buffer → send → receive → buffer → decode → display.
The data packets themselves can arrive irregularly, with variable timing between them (jitter). There's also a buffer holding incoming frames before decoding. If it's not tuned right, that alone can cause lag or glitches.
On top of that, there are cables that could be degrading the signal. There are settings on both the sending and receiving devices. There's the router. There's the streaming server's configuration. There's the protocol itself. There's a process priority on the player... You get the idea.
Time to dig in...
Honestly, this part of the troubleshooting turned out to be the most valuable for me, since it forced me to think systematically. I start diagnosing and ruling things out one by one:
- FPS set too high. If too many frames are being sent per second, they can pile up in the receiving device's buffer and cause lag. But we are already running FPS=30 (the standard for most streaming setups), and ffplay even has the nobuffer and low_delay flags set. So something else is driving the lag. Rejected.
- WiFi interference. The second easiest thing to check. Signal quality can depend on distance, so the lag could be coming from us walking around the apartment with the laptop. Let’s check the signal strength – since it stays stable (up to 280 KiB/s) regardless of distance, the hypothesis is rejected.
- Overload and throttling. Maybe the Pi just isn't powerful enough. Let’s open btop and check CPU, RAM, and throttling before and after running the code. Is everything within normal range? Yes, in my case. Rejected.
- Problem on the receiving end. To test this, we can open the stream on two or more different laptops. The "floating" lag shows up on the second laptop too, eventually. The hypothesis is rejected.
None of these turned out to be the culprit. And while I never did pin down the actual source of the lag, I did find a more direct and general way to sidestep this whole class of problem going forward. Honestly, I probably should have just done this from the start... but then again, we're here to learn from our mistakes, right?
Decoupling: Separating reading from processing
If the program is doing heavy lifting (running YOLO, drawing the results, displaying the final frame...), that takes time. Meanwhile, newly arriving frames just keep stacking up.
Once the program finishes with one frame, it pulls the next one in line from the buffer. But by then that frame is already old, and there's a whole backlog still ahead of it before it catches up to real-time.
Which means the lag just keeps compounding over time.
To make sure YOLO always grabs the most recent frame available, decoupling is the way to go. And honestly, a necessary one.
Decoupling means splitting responsibilities between different parts of the program. In our case: reading and processing. One part (the producer) handles receiving and reading frames, while the other (the consumer) uses them for whatever it needs. To run both simultaneously, you use a thread, a separate execution path within the process.
Let’s set up a reader thread that continuously pulls data from the stream, and a main thread running the core YOLO code. We need to define a shared variable to hold the current frame: the reader thread writes to it, and the main thread reads from it.
Important not to forget a lock, so only one thread can access the variable at any given moment. And to make a copy of the frame for the main thread to avoid any overlap. That's what protects us from a nasty race condition.
Now let’s run the code with the model and observe a dramatic improvement! The image is smooth, nothing's stuttering, the model's results display properly, and the data is always current. There we go!
Adding an alarm: Cat on the table!
The camera's mounted, the stream is running, the cat is sitting on the table, and the model is detecting it. But just watching this happen is pointless and boring. Time to actually get some real value out of the vision system!
The original plan was to send the cat's coordinates to the water turret. But since the turret isn't ready yet, we can implement something simpler in the meantime. Like an alarm that triggers on the target condition: “a cat on the table”.
The buzzer
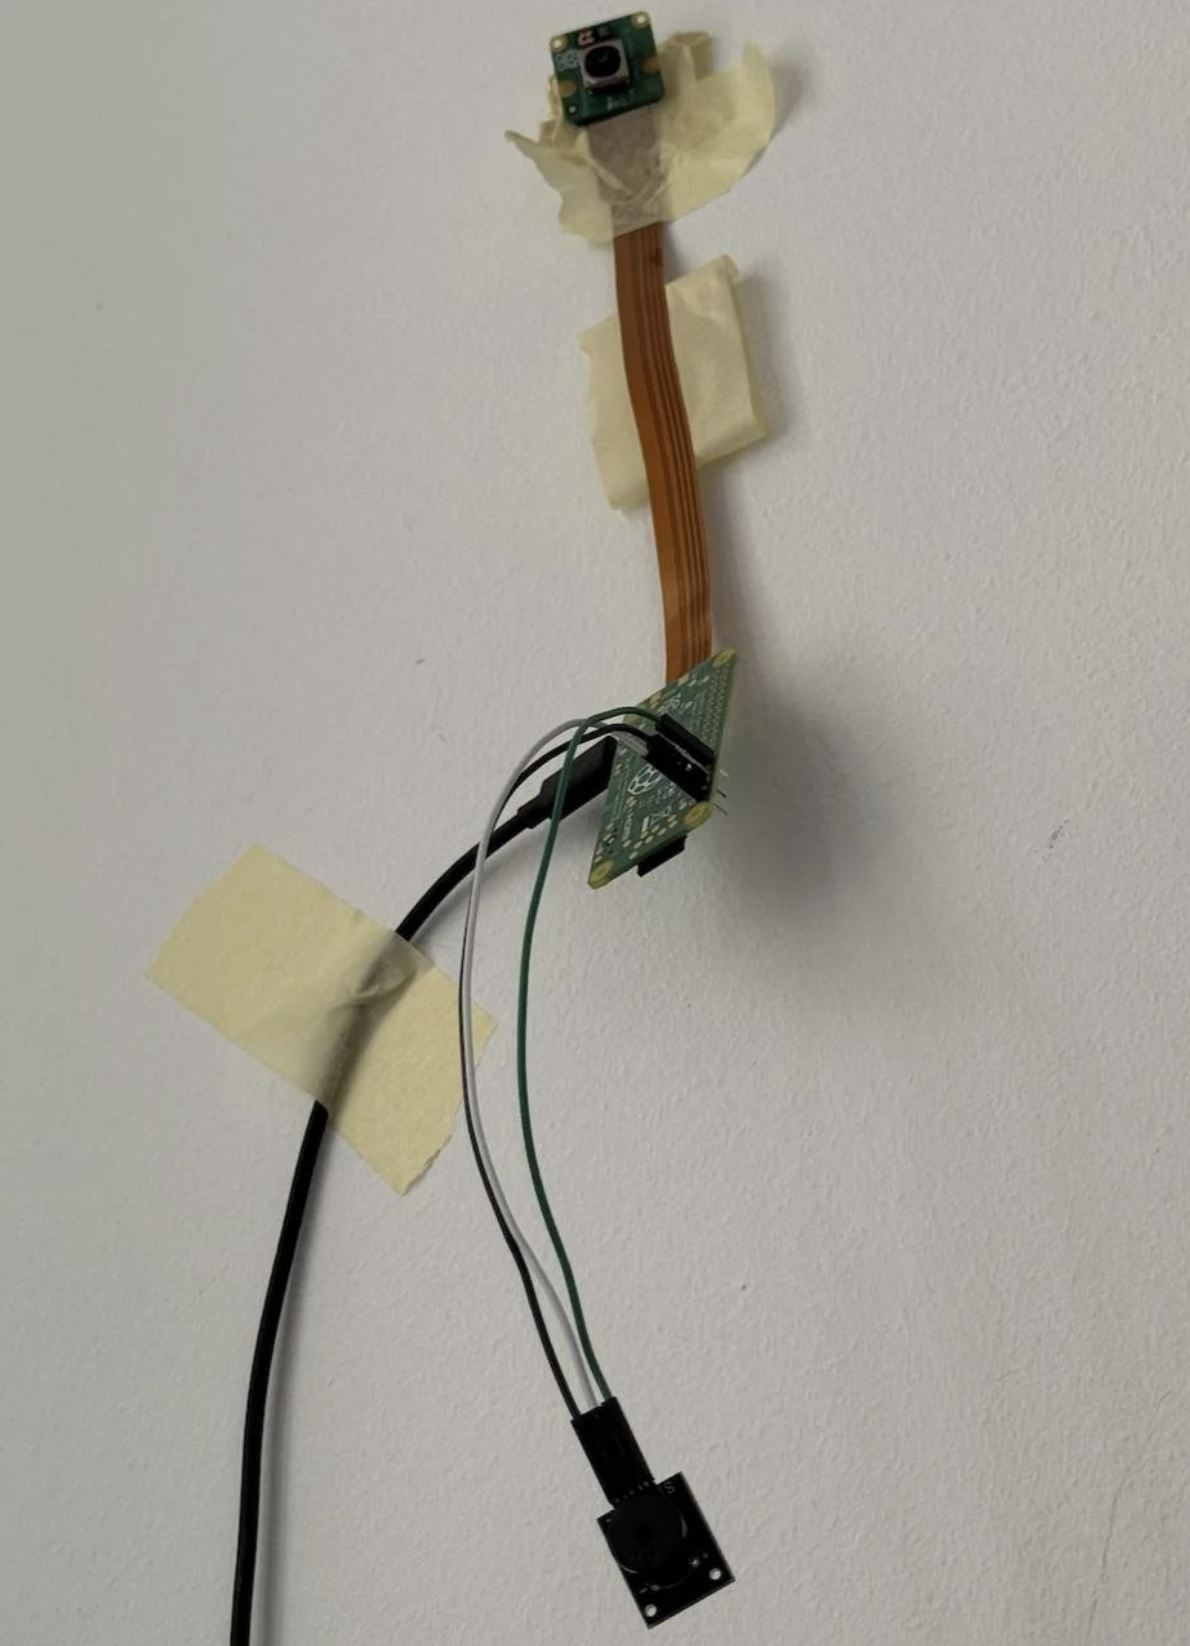
First, we need to dig up a forgotten piezo buzzer from a stash and beg a friend for the wiring to go with it. Now we can hook it up to the Raspberry Pi by hand, after tracking down the correct pin documentation.
Since my buzzer turned out to be an active one, all I needed to do to trigger it is send a signal to the right GPIO pin. So let’s write a test script on the Pi using lgpio, set the pin number, tune the frequency and duration of the sound, and turn the pin back off afterward.
Sound confirmed – it's an obnoxious little beep. Exactly what we wanted.
Flask HTTP server
Quick reminder: the main YOLO code is still running on the laptop, while the buzzer lives on the Pi. So now we need to connect the two so we can trigger the alarm remotely. To this end, I recommend going with setting up an HTTP server (Flask) on the Pi.
An HTTP server is just a small web server that listens for incoming requests at a given address on the local network. When a request comes in, the server runs the script that fires the buzzer.
Let’s install Flask on the Raspberry Pi and write the server script there, defining the route and the instructions for triggering the alarm script. From the laptop, let’s just send a request to that address. Buzzzzz. It works!
Conditions in the YOLO code
Last step: Wire all of this into the main YOLO pipeline. At the beginning, I was about to recommend sending a request to the server if the “cat” class is detected in the ROI. But after thinking about it a bit more, I insist on both "cat" and "dog" classes. Because YOLO frequently confuses the two.
Now we can run it... and there we go! The cat has zero chance of jumping on the table undetected, because the warning sound goes off through the whole apartment. And good lord, it turns out the cat does this way more often than anyone can imagine.
So now we actually have something that works! Looking back, it was a solid stretch of progress. Plenty of code written, modifications made, steps taken, and problems solved.
“It is better to commit and document everything, or you will never be able to reproduce it” - this was my thought when I hit the stage. But at that moment, I decided that it was a job for another day — for now, riding this win, I closed the laptop and headed off to relax, pretty pleased with how things turned out.
Little did I know what an unpleasant surprise was waiting for me the next day...
Why automation matters
...And the very next day, the Raspberry Pi decided to say "goodbye" and just stopped booting. Turned out the microSD card had died. And with it, every piece of code, every config, every server I had running on the Pi. I was so mad.
But what made me even angrier was realizing I'd been relying purely on my own hands and memory. No automation, no duplication, no syncing of program installs or files on the Pi. At least the laptop code was committed to git.
So, long story short, everything was gone. What configs were on there, what troubleshooting fixes had I made? No clue. I genuinely didn't remember anymore.
This is obviously a classic problem: hardware fails, SD cards fail, and they can do it at any moment. So you'd better use my lesson to actually take automation seriously.
If such shit happens, don't panic (much).
Let’s grab a new microSD card and reinstall Linux from scratch. From here on, no more manual work on the Pi.
Ansible
Instead, everything goes through Ansible (Docker or GitHub Actions feel like overkill and are not really the right fit here).
Ansible lets you SSH into another device, run commands, install software, copy and edit files, and start servers. All driven through a playbook (a .yml instruction file). One nice thing: if you run the same playbook a second time, it only applies what's changed. One bad thing: playbooks run fairly slowly, so I wouldn't reach for Ansible for rapid, iterative code changes.
Let’s install Ansible on the laptop and create two files in one directory: an .ini file (just the Pi's address and username) and the playbook itself. In the playbook, we want to write out everything that needs to happen: Installing the right versions of base programs (Python, Flask, etc.), setting up the MediaMTX config, launching the Python scripts, etc. All in one place.
Then we just run the playbook from the laptop and fix whatever breaks along the way (and yes, something always breaks).
And... done! Now, even if the Pi dies again, recovery takes no longer than running a single playbook.
systemd
The last piece is making sure the programs will not crash on failure and will actually run in the background. Worth remembering: at this point, both MediaMTX and the HTTP server are only running because we manually start them in a terminal. Meaning they can crash the second that terminal is closed or something glitches.
To fix that, let’s bring in systemd.
systemd is a Linux tool for managing programs at the system level. It works through a configuration unit file (.service), where you specify what to run, under which user, and what to do if it fails.
We want to create unit files for MediaMTX and the HTTP server, add instructions to the Ansible playbook to copy and launch them, and run it. Done!
The final step: Ditching the laptop
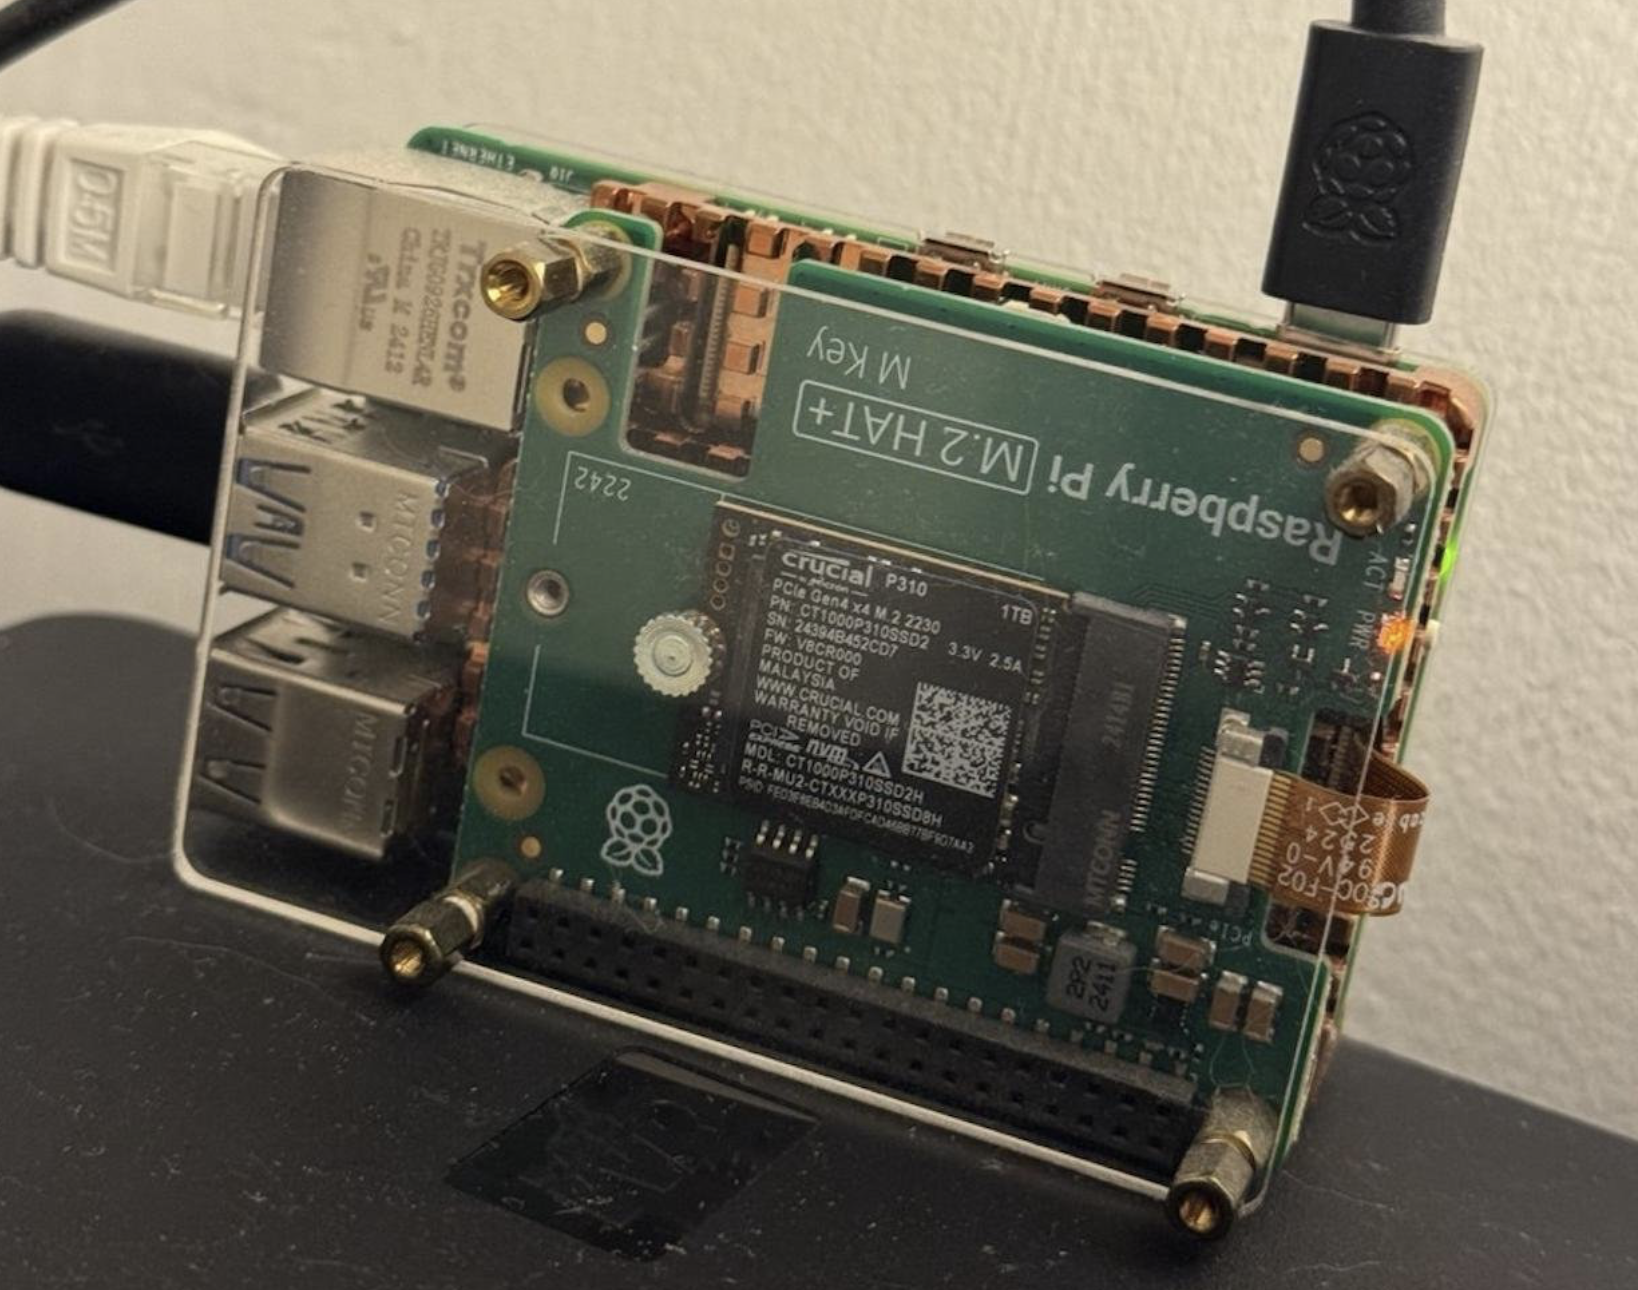
One last step remains to make the system fully autonomous: Moving the main code off the laptop and onto a dedicated home computer box. In my case, it is the Raspberry Pi 5. With that in place, cat defense can run autonomously 24/7, no manual intervention needed.
The Pi has no display, so the code needs to be adapted for headless mode. That means swapping opencv-python for opencv-python-headless, along with a few small tweaks to the frame-reading logic.
Can't forget uv venv, so let’s prepare a requirements.txt ahead of time. This part also runs through systemd, since the program needs to restart automatically if it crashes. And to tie it all together, we put the corresponding Ansible playbook and .ini file.
Run it. Test it. Fix what breaks.
The (not quite) final result
So, where did all this work leave us? A small kitchen device mounted on the wall at the optimal filming angle. The system monitors the cat and beeps whenever it jumps on the table or climbs into the sink.
Wins so far:
- The system is cheap to build (camera: €32, Pi: €20), ordered from Amazon with fast delivery;
- The camera is tiny but genuinely good quality;
- YOLO is free, lightweight, fast, and accurate enough for the job;
- The camera doesn't have night vision. Which actually turned out to be a feature, not a bug – it means no alarms go off at night (YOLO simply can't detect anything in the dark);
- The system can also log the cat's behavior and track its activity on the kitchen surfaces over time;
- Now the cat can't get away with stealing forgotten food anymore (well, unless you're too slow to catch him in the act).
On deck for next step:
- Fine-tuning the model to improve classification accuracy. It turned out YOLO mistakes curly hair for the cat, and somehow can't recognize the cat’s butt at all. Both gaps make sense once you think about what's typically in training data. More on this in a dedicated post, since there isn't room here.
- Extracting the object's coordinates. This is where things get tricky with a 2D image. I'll likely need to reconstruct a 3D scene to get accurate positioning.
- Deciding whether to mount the camera directly on the turret (simpler for coordinates, harder for ROI) or keep the turret separate with a fixed camera.
- Whether to add night vision so the turret can operate around the clock.
Since this project is very much ongoing, there are two more posts coming: one on fine-tuning the model on custom data, and another on integrating cat defense with the water turret. So this isn't goodbye!
All that said, this has already turned into a great project. It teaches you a ton, from setting up Linux all the way to deploying a model in production.